Creating new project
This section provides a step-by-step tutorial showing how to create a new project, add a new file, initialize a git repository, and publish the repository on Github.
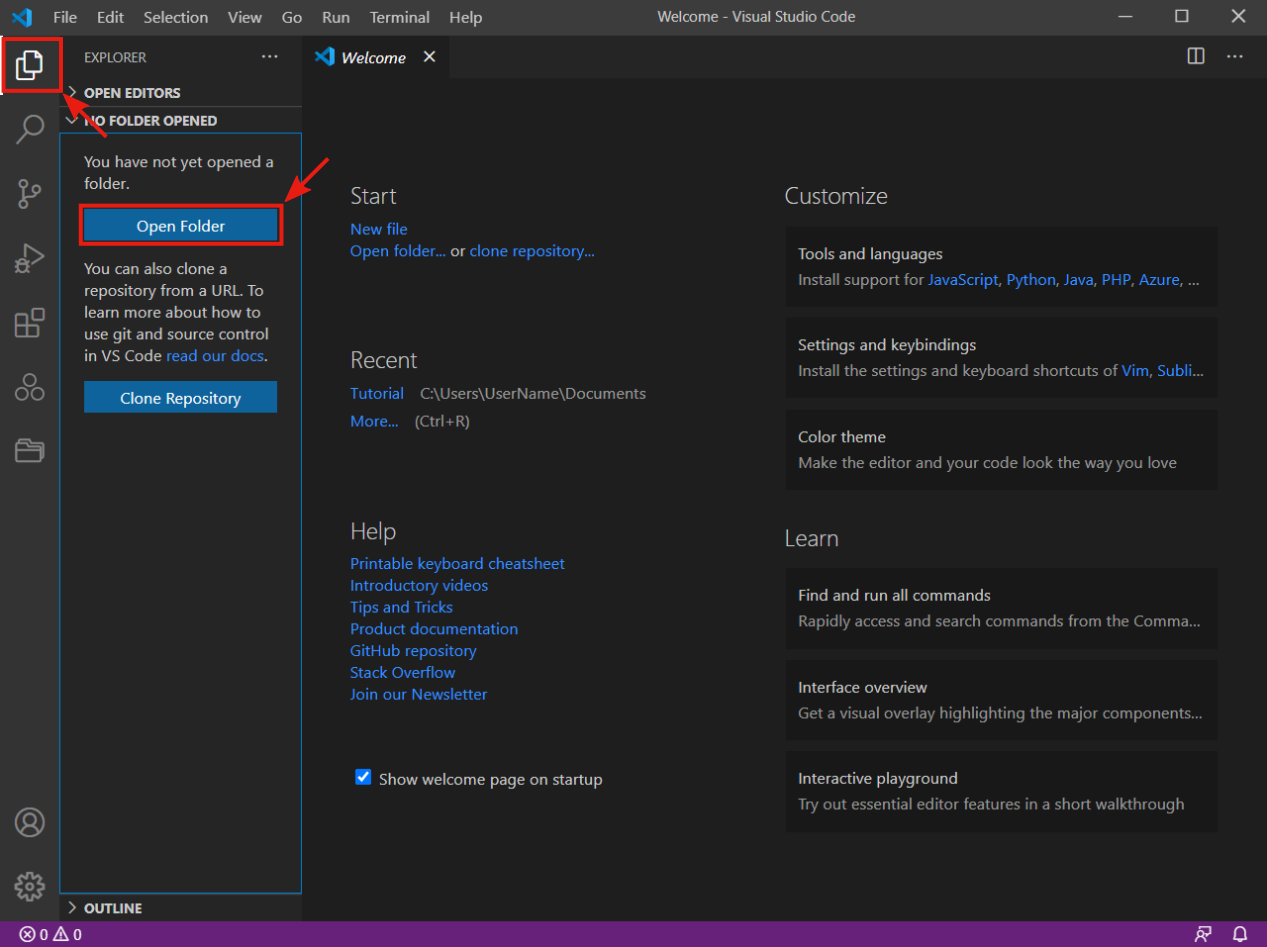
The first thing we have to do when creating a new project is to select a folder where we want to store the project. Open the file Explorer in the VS Code by pressing its icon in the activity bar and pressing the Open Folder button. Alternatively, use the keyboard shortcut Ctrl + K Ctrl + O.
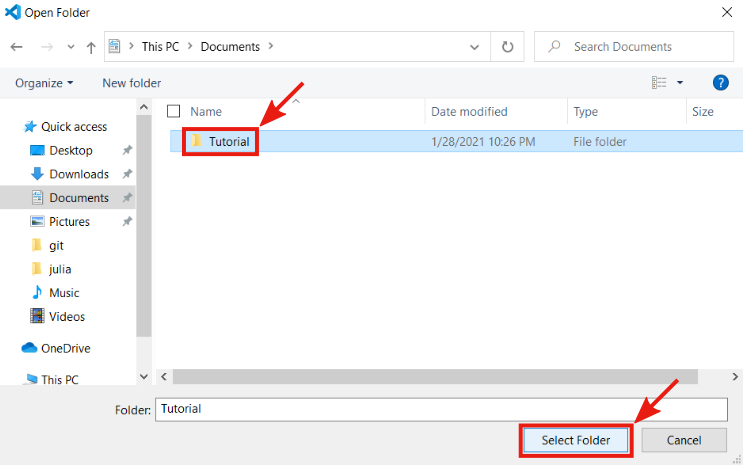
A system file explorer should open, so find and select the folder you want to use as a project folder. In our case, it is a Tutorial folder in Documents.
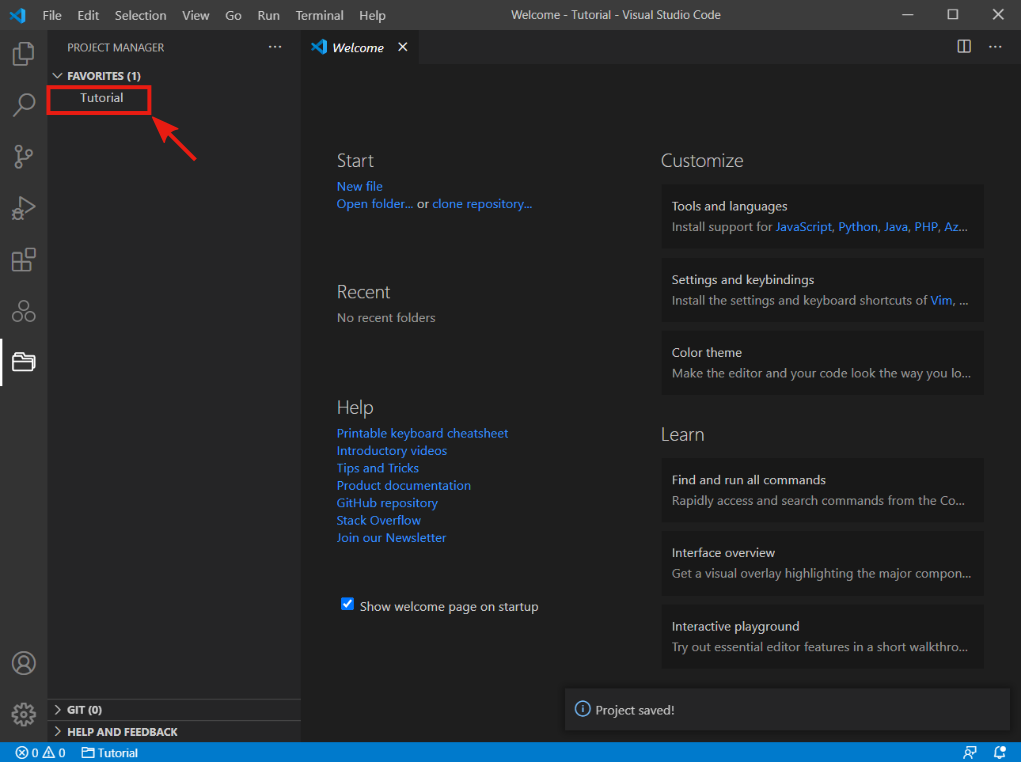
Now go to the project manager by pressing the appropriate button in the activity bar. Since we are creating our first project, the project manager tab should be empty. Press the Project Manager: Save Project button, type a project name in the pop-up bar, and then press Enter.
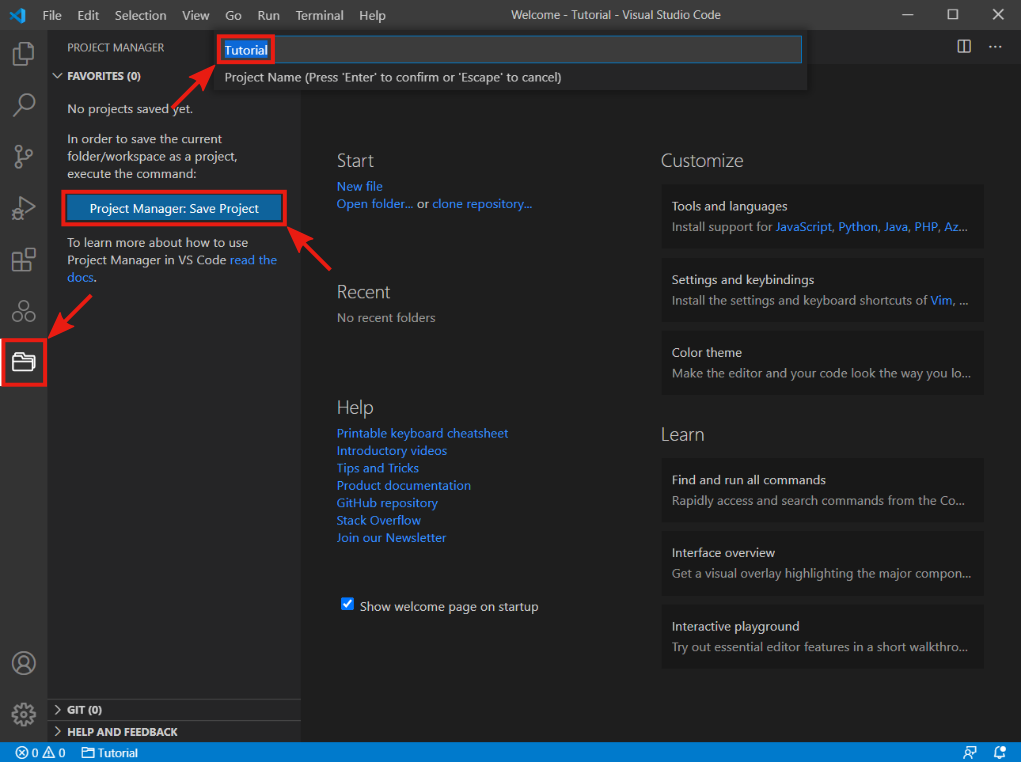
It will add a new project to the project manager. In our case, it is a project called Tutorial.
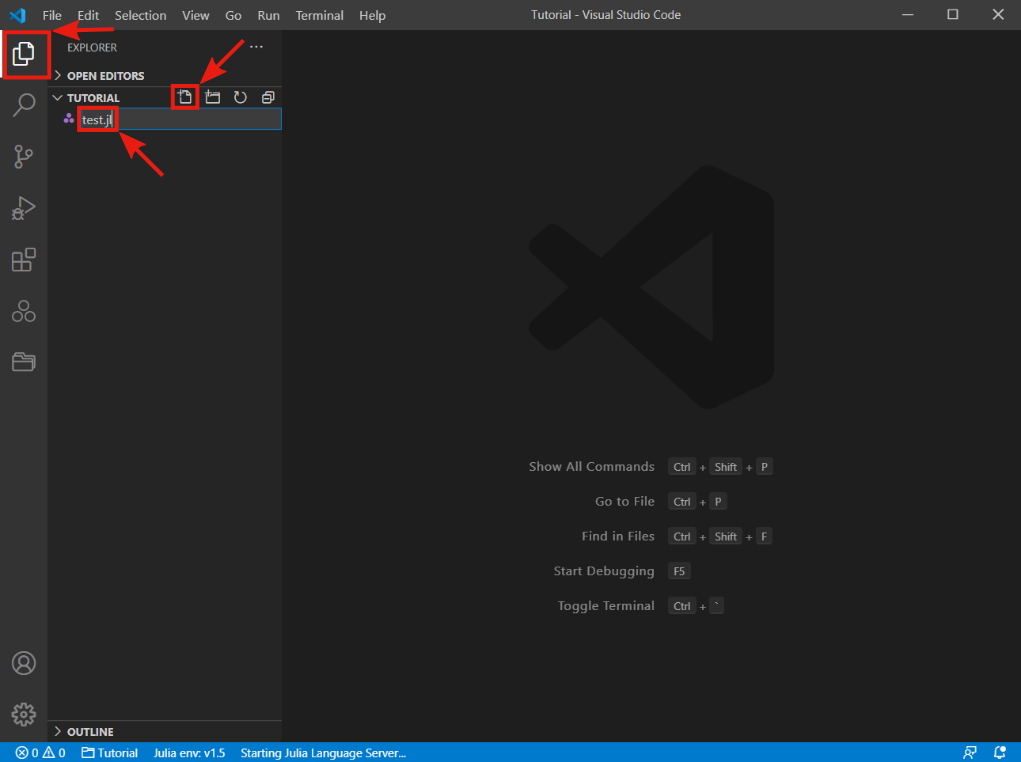
Now go back to the file explorer. In the sidebar, under the project name, there should be an empty space. Press the New File button next to the project name and write a new file name with the .jl extension. Alternatively, use the keyboard shortcut Ctr + N to create a new file and then Ctrl + S to save the file.
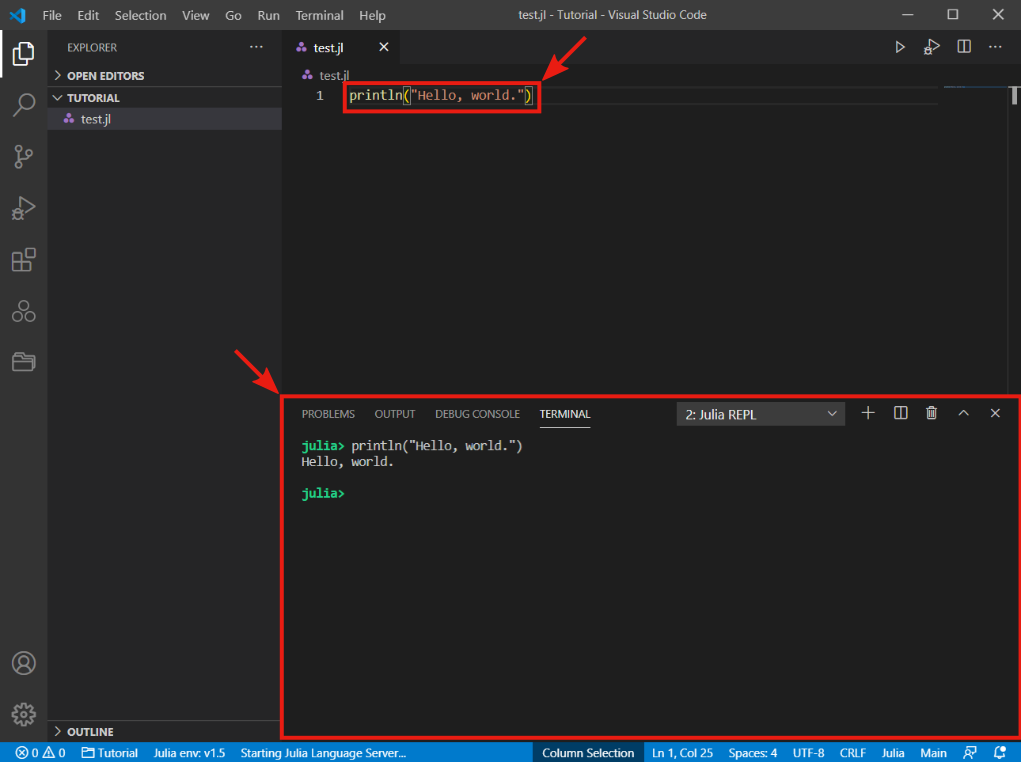
The new file will open in the editor to the right of the File Explorer sidebar. Type println("Hello, world.") in the new file and press Ctrl + S to save the change. Now select the code and press Ctrl + Enter to execute the code. This shortcut runs the new Julia session and sends the code to the session. Congratulations, you have just created and run a Hello, world program in Julia.
Initialize Git repository
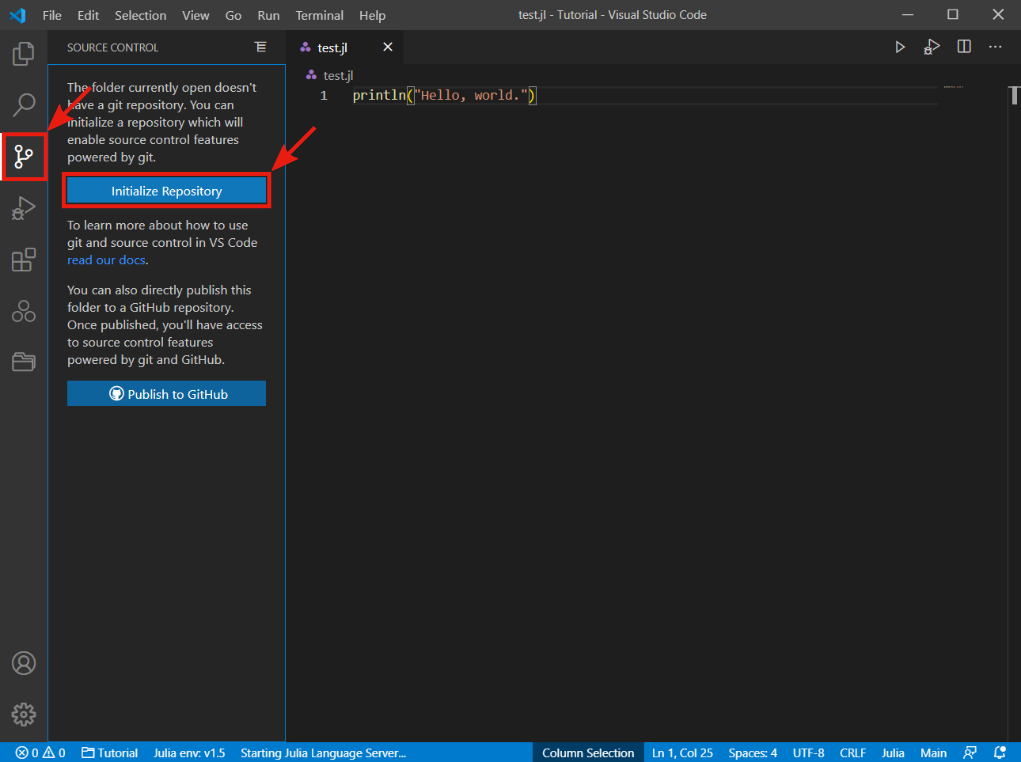
Now that we have created a new project, it is time to initialize the git repository to track the project's changes. Go to the Source Control bar by pressing the appropriate button in the activity bar. Then press the Initialize Repository button, which will create a new Git repository in the project folder.
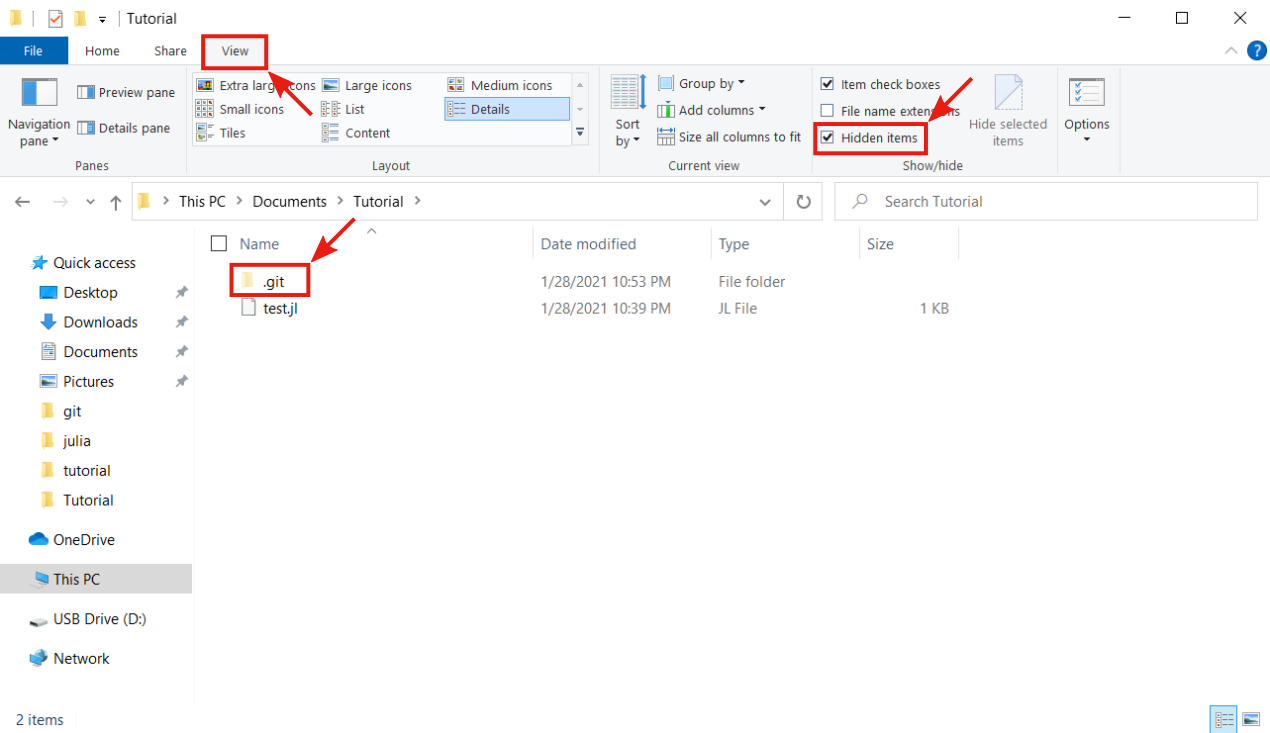
We can check if the Git repository is initialized in the system file explorer. Go to the project folder, and in the file explorer, in the top bar under the View tab, select the Hidden items option. Now you should see the .git folder in the project directory.
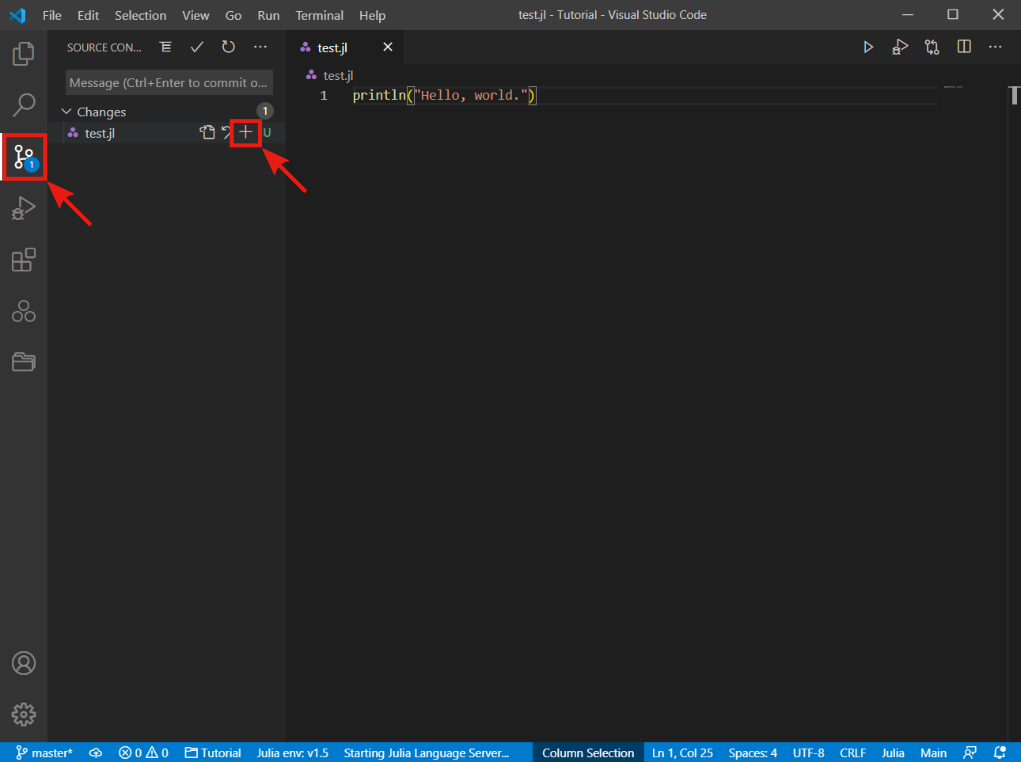
With the initialized Git repository, we can start tracking our work changes. Note the number 1 in the control source icon. It indicates one change against the last version of the project.
Git provides the commit command to capture changes in the project. To create a new git commit, we must first select what changes we want to capture. In our case, it is trivial since there is only one change. In the source control under the Changes section, you should see the test.jl file. Press the Stage Changes button located on the file name's right (+ icon).
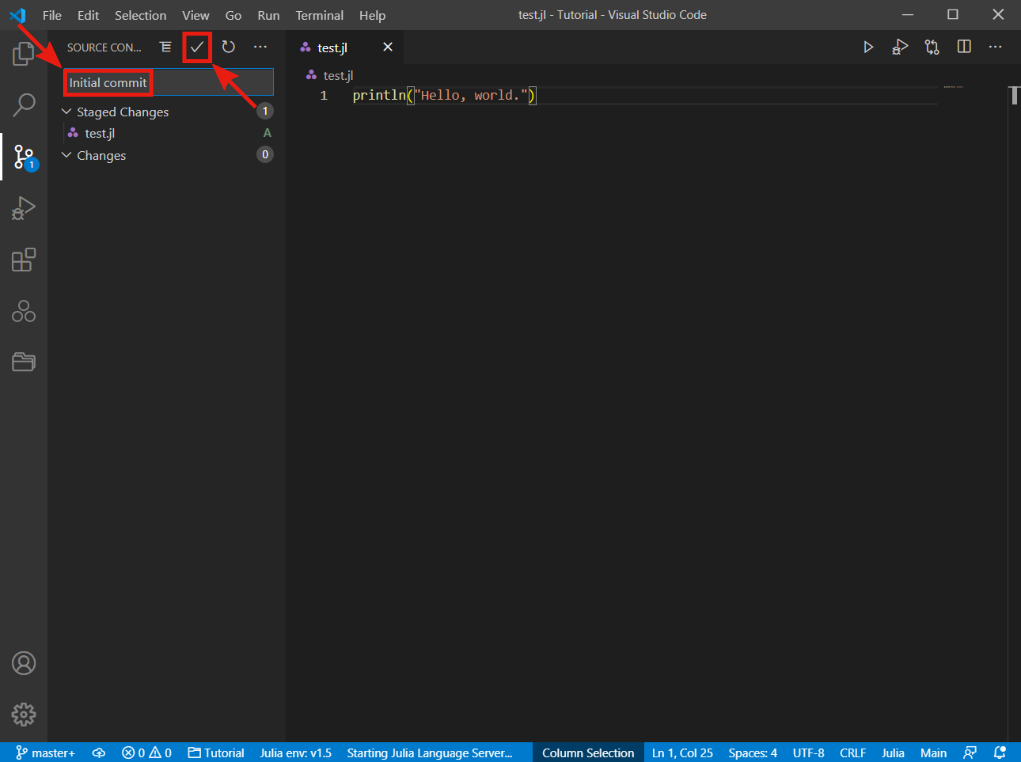
This moves the file under the Staged Changes section. The next step is to add a summary to the git commit. Type any message that describes changes made in the project. It is good to use short but descriptive messages since it will help navigate the project history. We use the Initial commit message. To finish the git commit, press the Commit button above the message bar or use the keyboard shortcut Ctrl + Enter in the message bar.
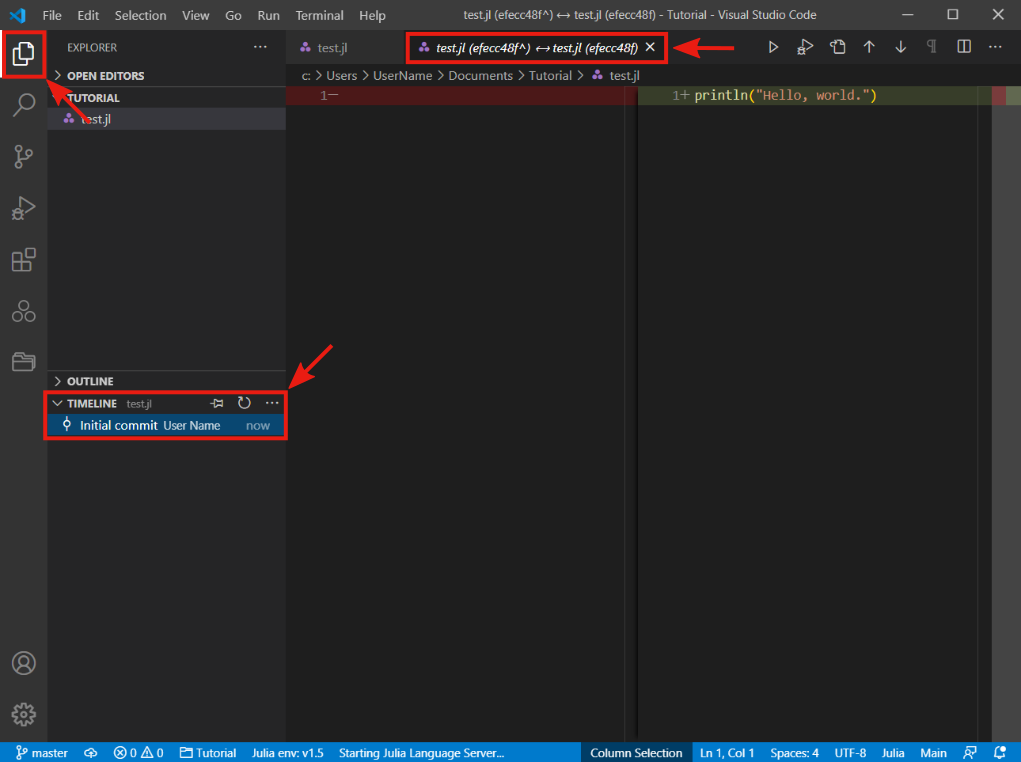
Now return to the file explorer bar and open the Timeline drop-down menu at the bottom. In the Timeline bar, you can see the currently open file history. In our case, we can see the history of the test.jl file: one git commit created by user User Name and described by the Initial commit message. If you click on that git commit, it shows changes made to the current file. On the left-hand side, we can see the file's state before the git commit and on the right-hand side after the git commit. It allows us to see all the changes made in the file. We can see that we added one line of code.
Publish on GitHub
Now it's time to publish our work on GitHub. With GitHub, it's easy to share and collaborate on a project with multiple people. If you did not create a GitHub account in the previous section about Git installation, please do it now.
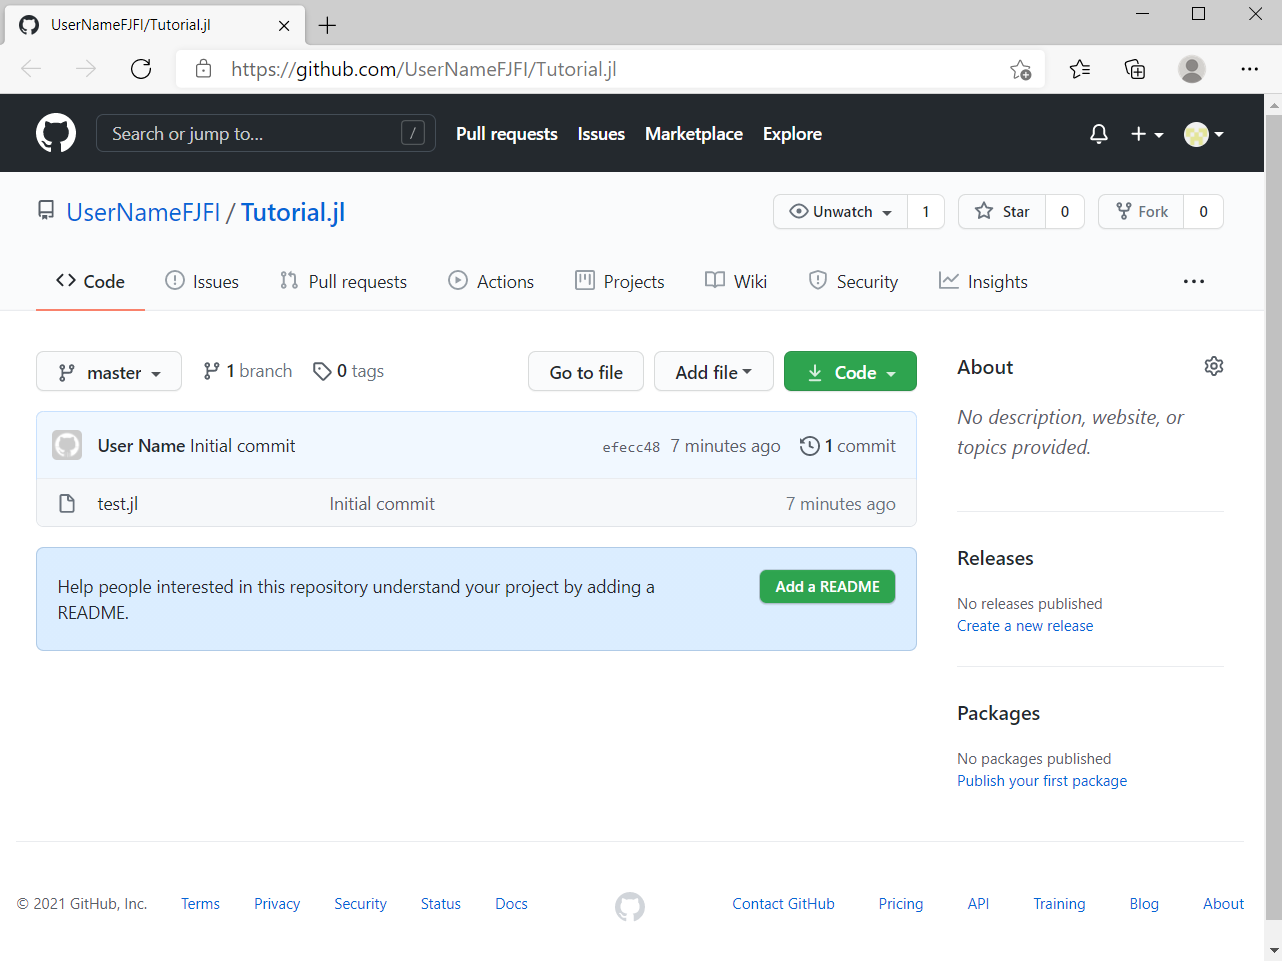
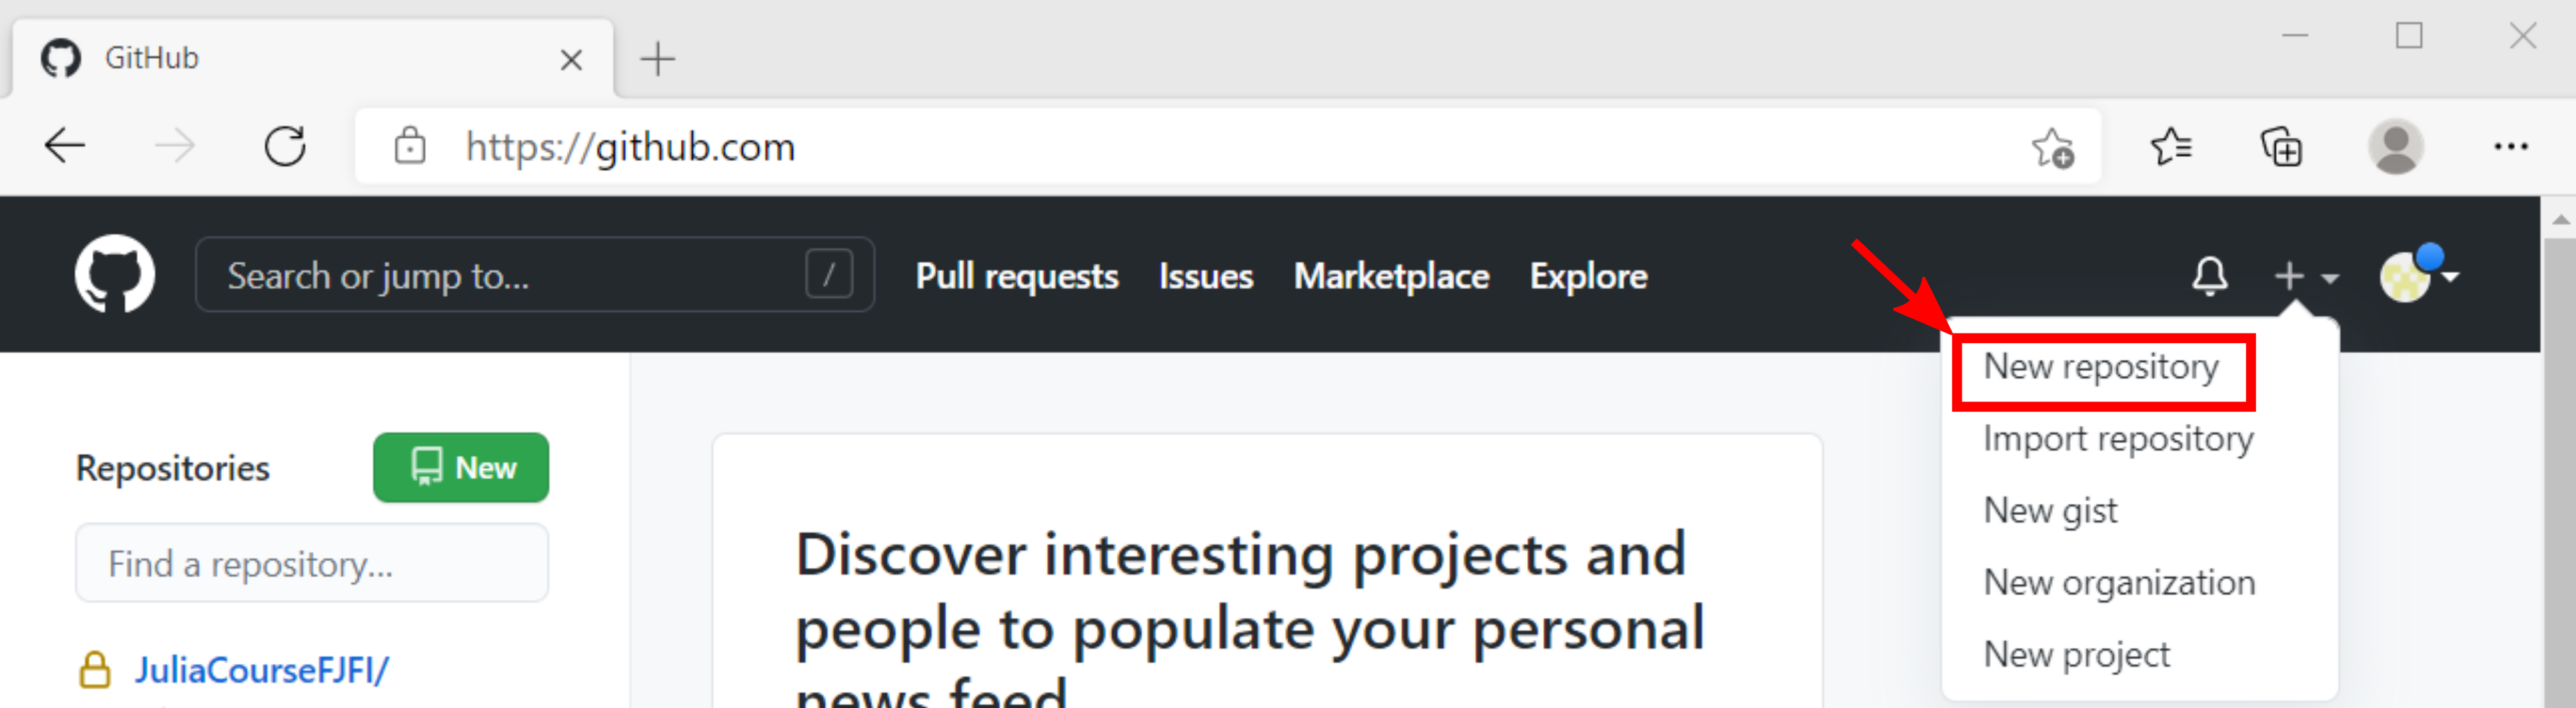
Firstly we have to create a new empty repository on GitHub. Press the + button in the GitHub website's top right corner and select the New repository option.
Enter the desired repository name and select whether the repository should be private or public, and press Enter. In our case, we use the Tutorial.jl name for the repository since it is an easy way to show that the project is written in Julia.
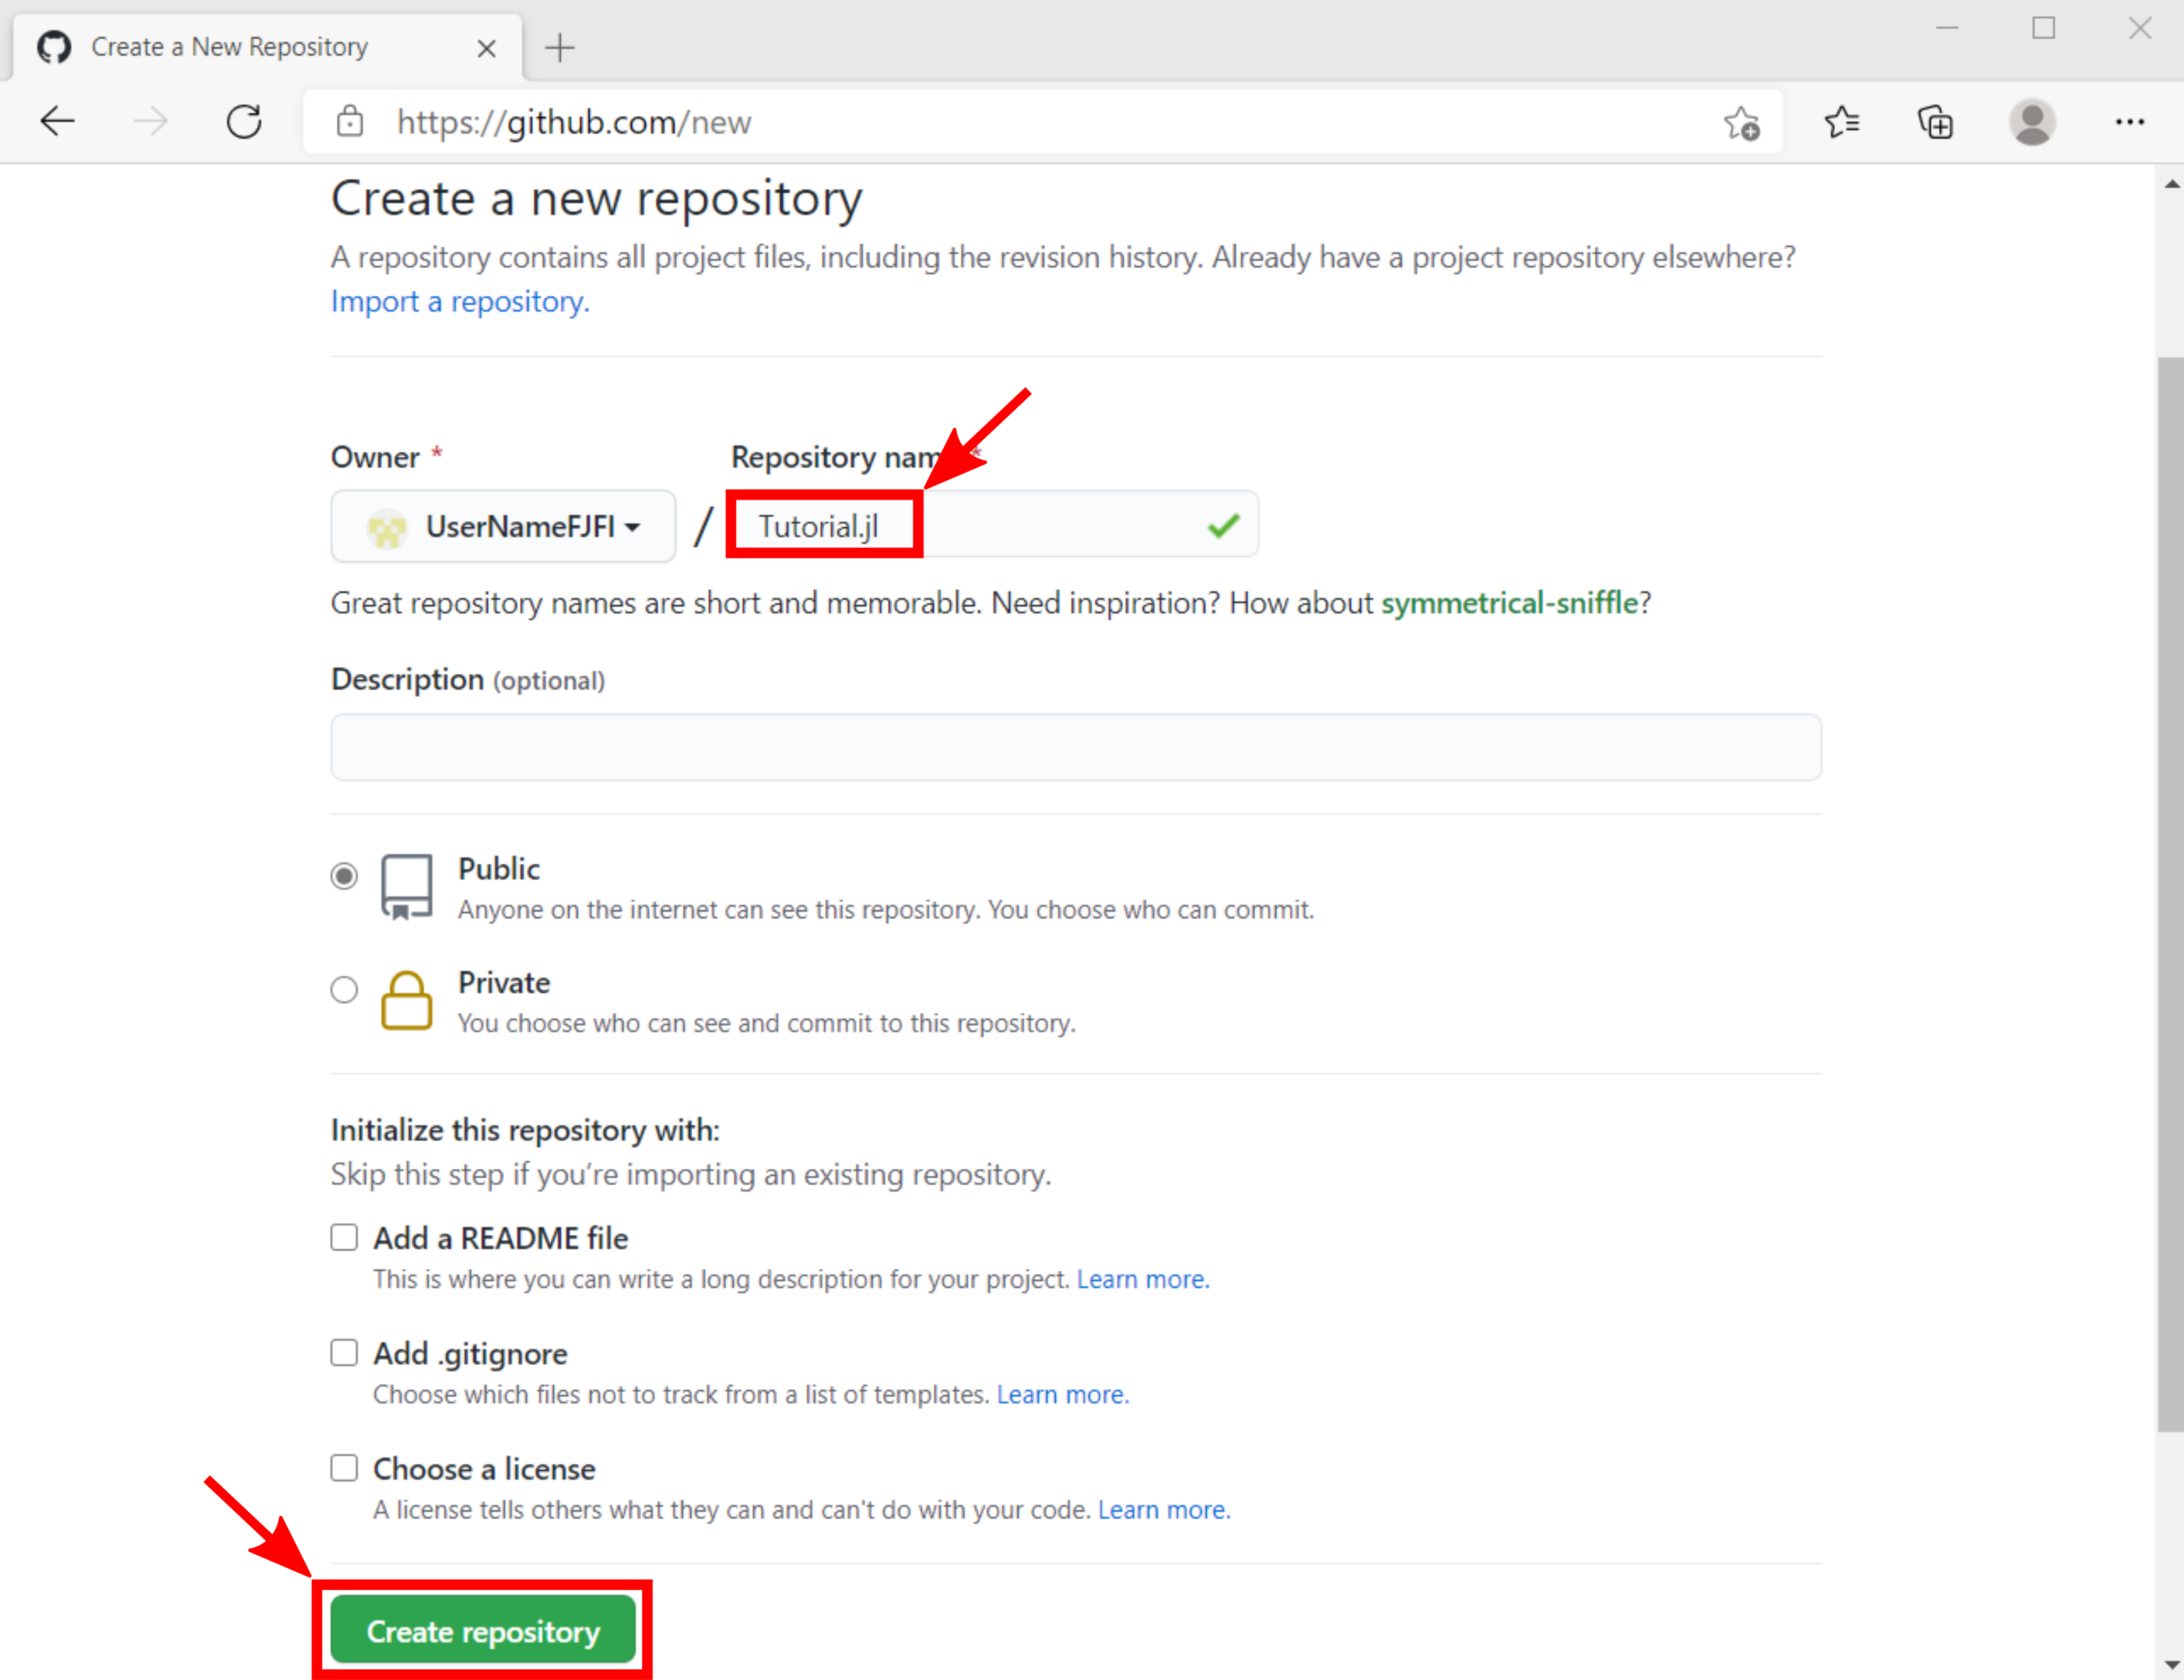
When the new repository is created, select the repository URL and copy it. We will need it in the next step.

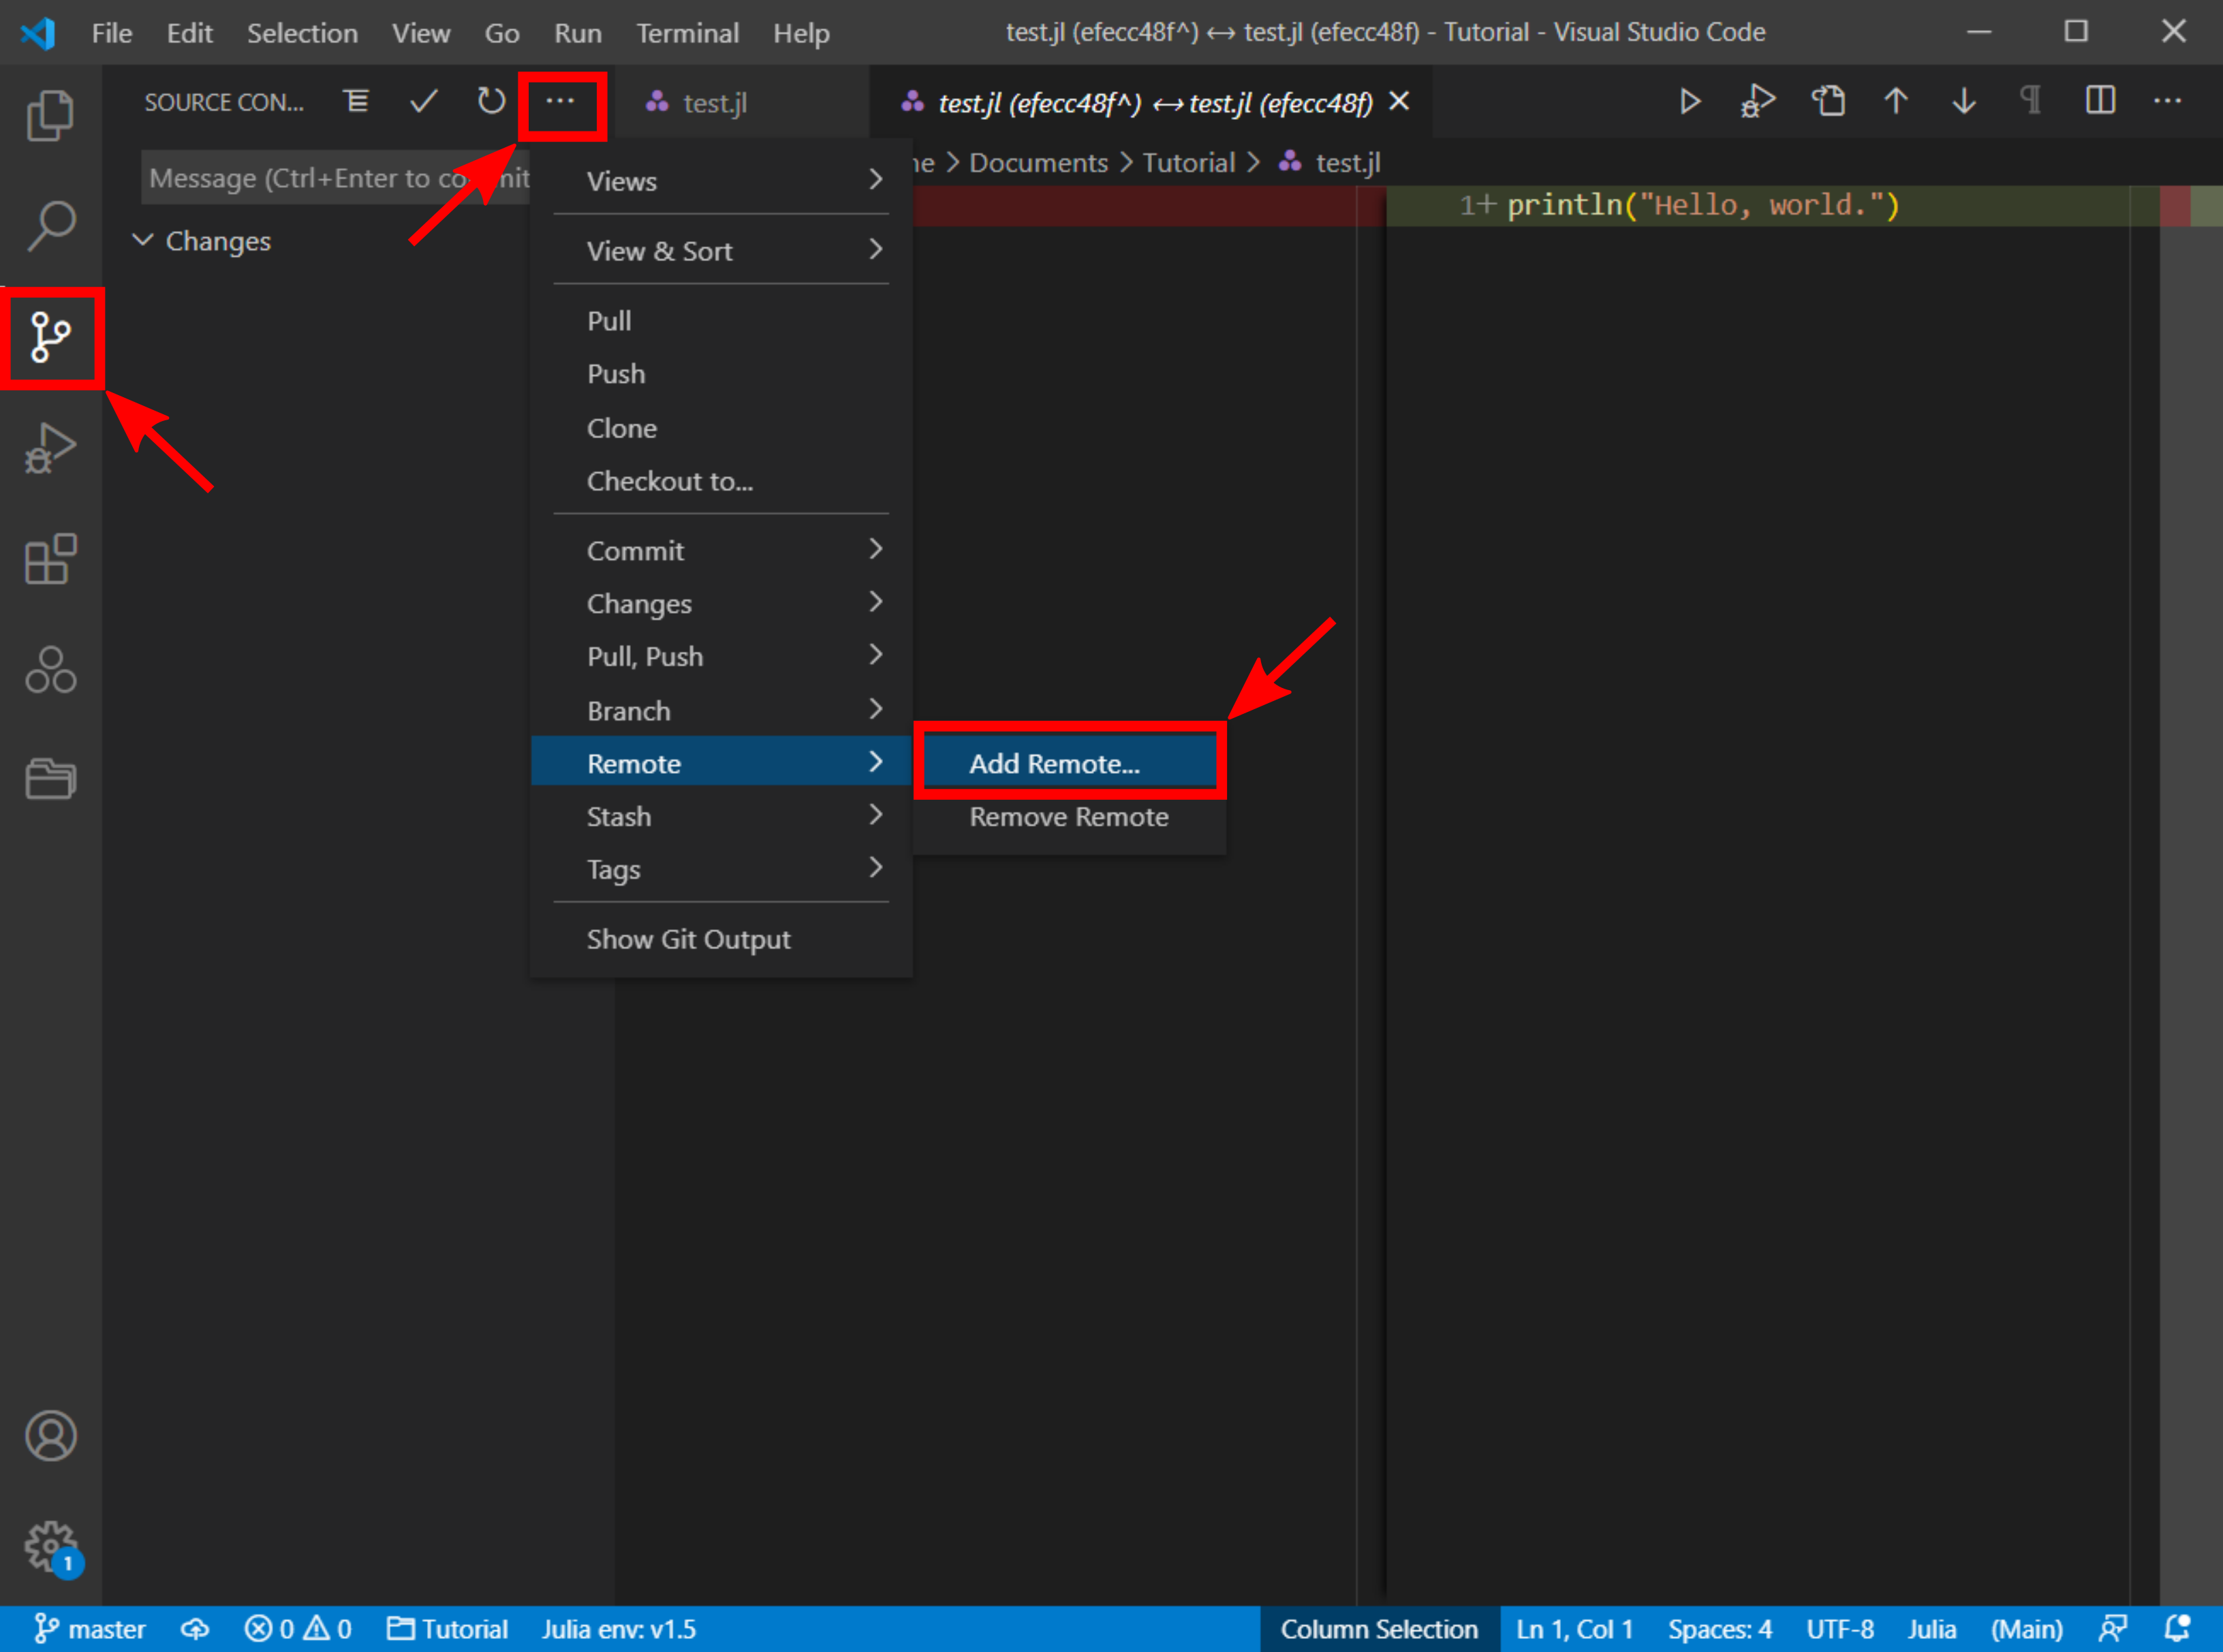
The next step is to add a new remote repository to the local Git repository. It can be done directly from the VS Code. Go to the Source Control bar by pressing the appropriate button in the activity bar. Then press the ... button to open the pop-up window and select the option Remote and then Add Remote....
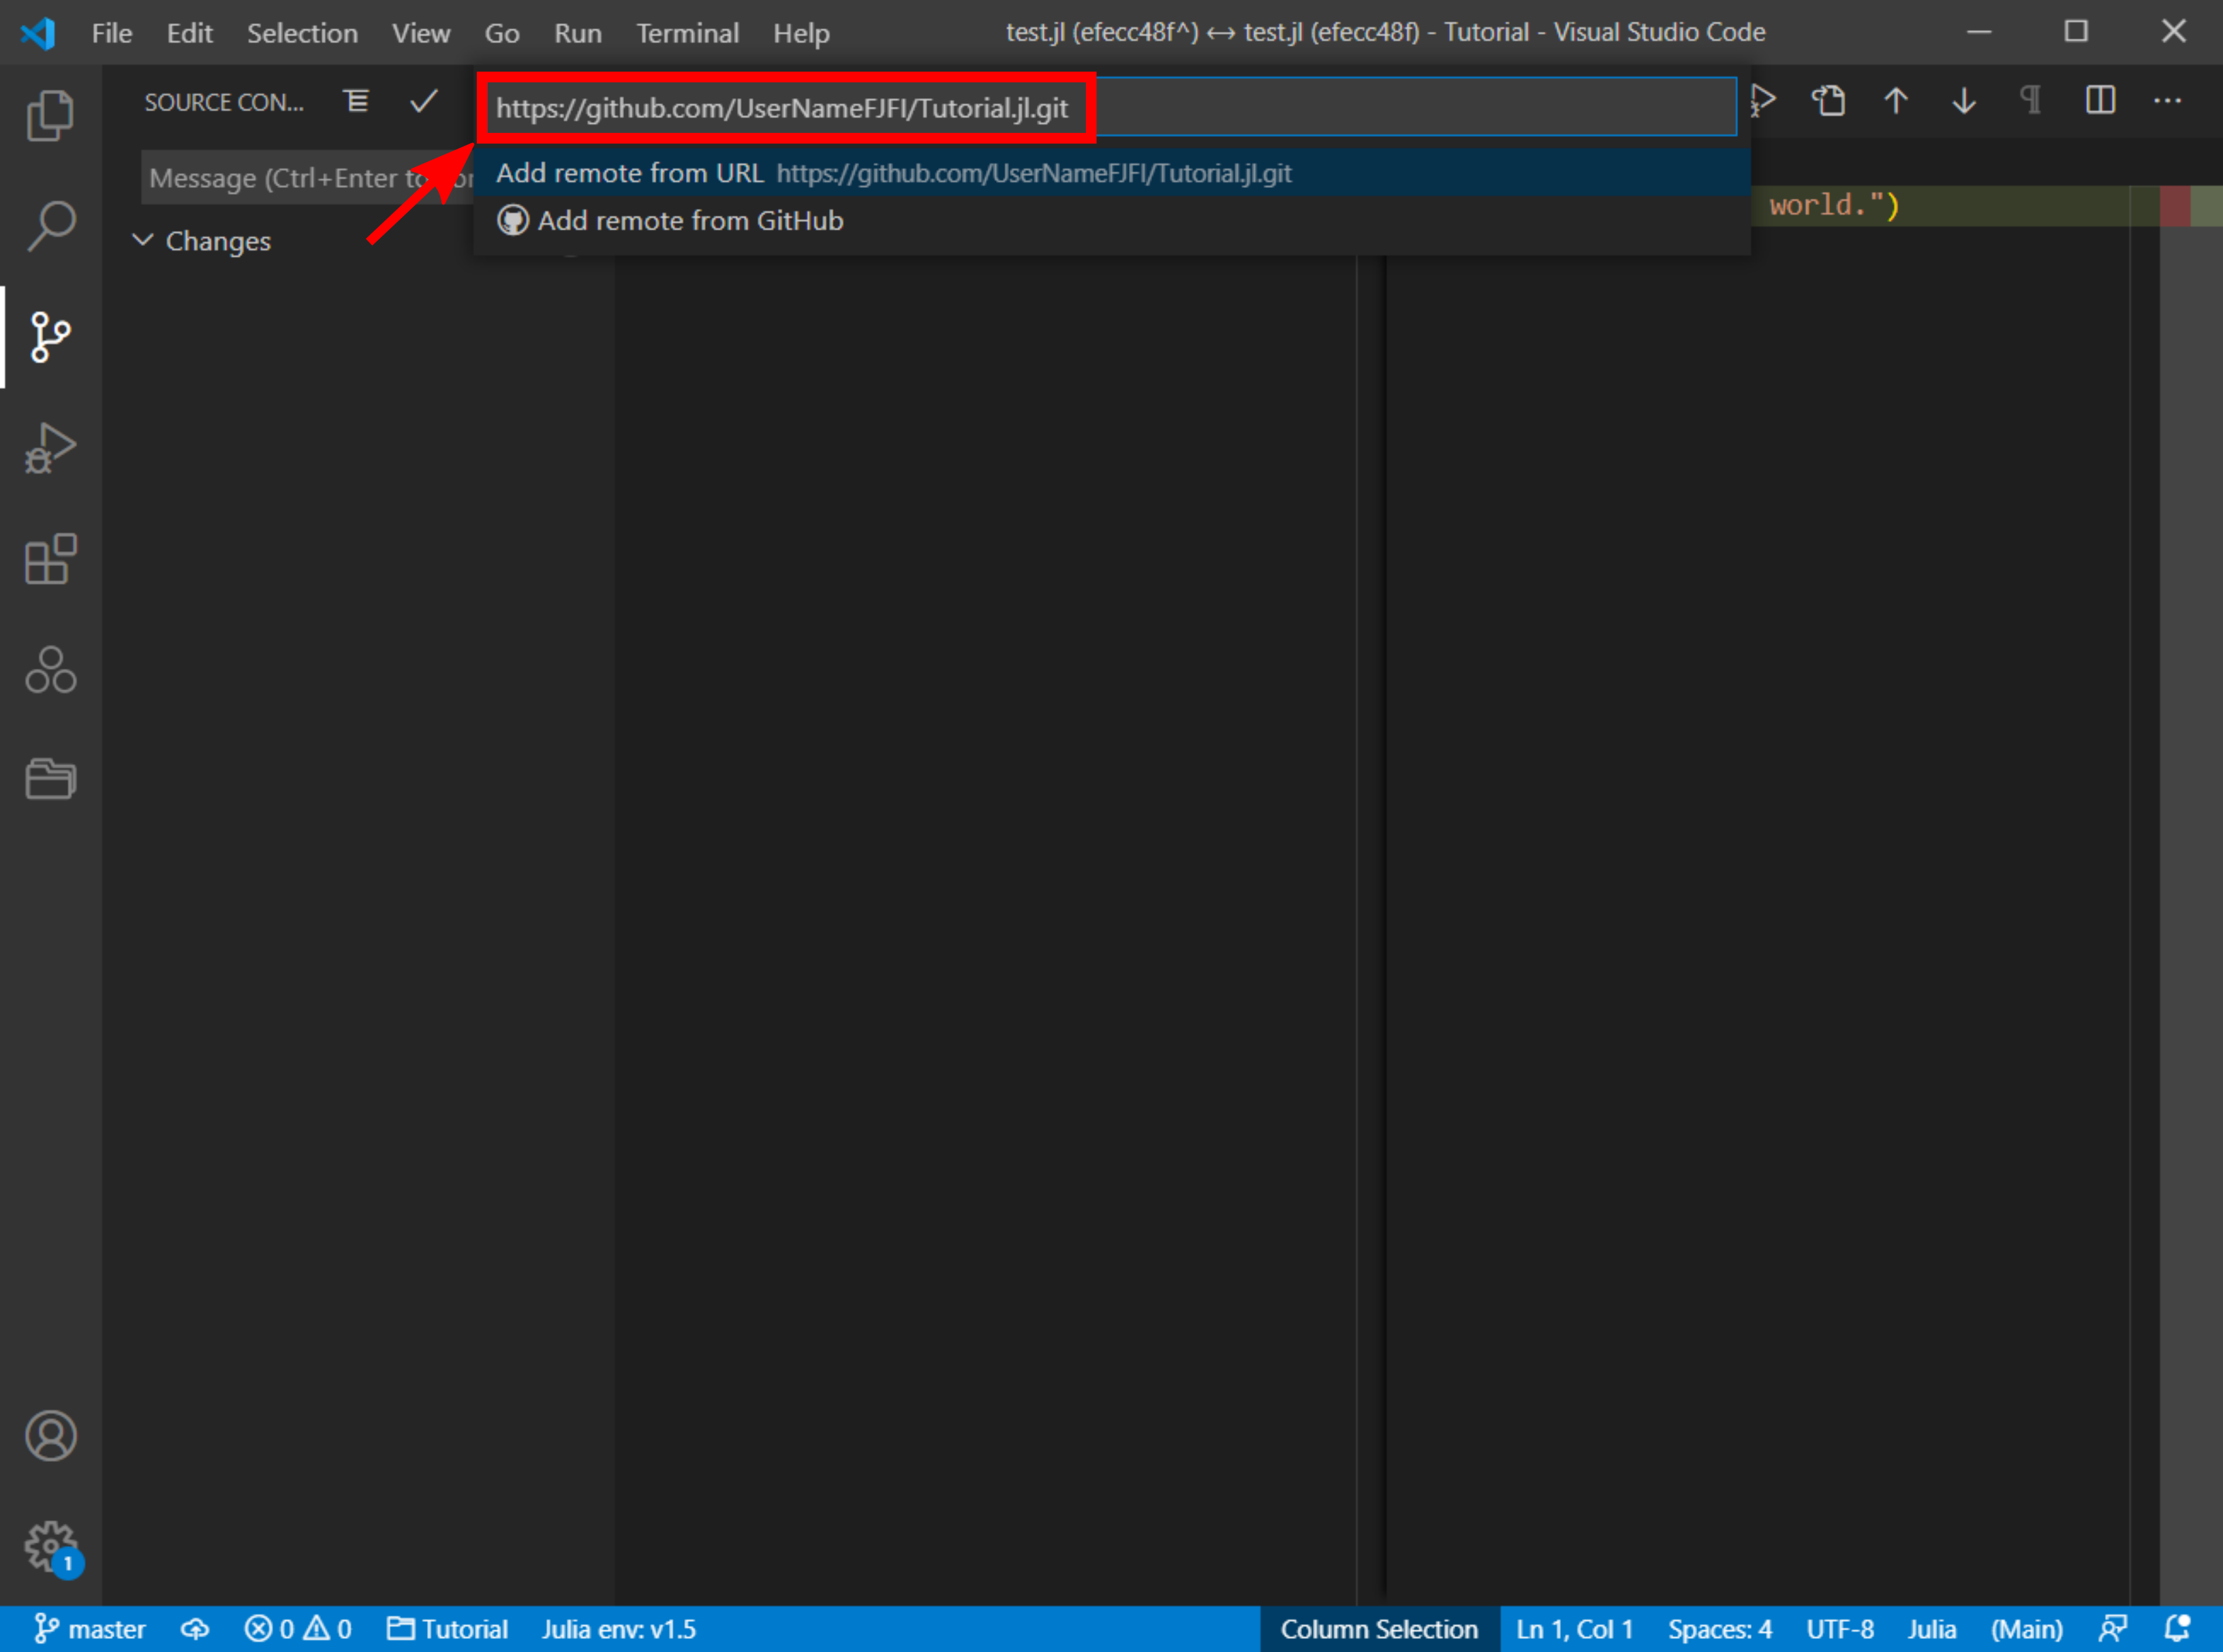
In the pop-up window, enter the URL of the GitHub repository created in the previous steps and press enter.
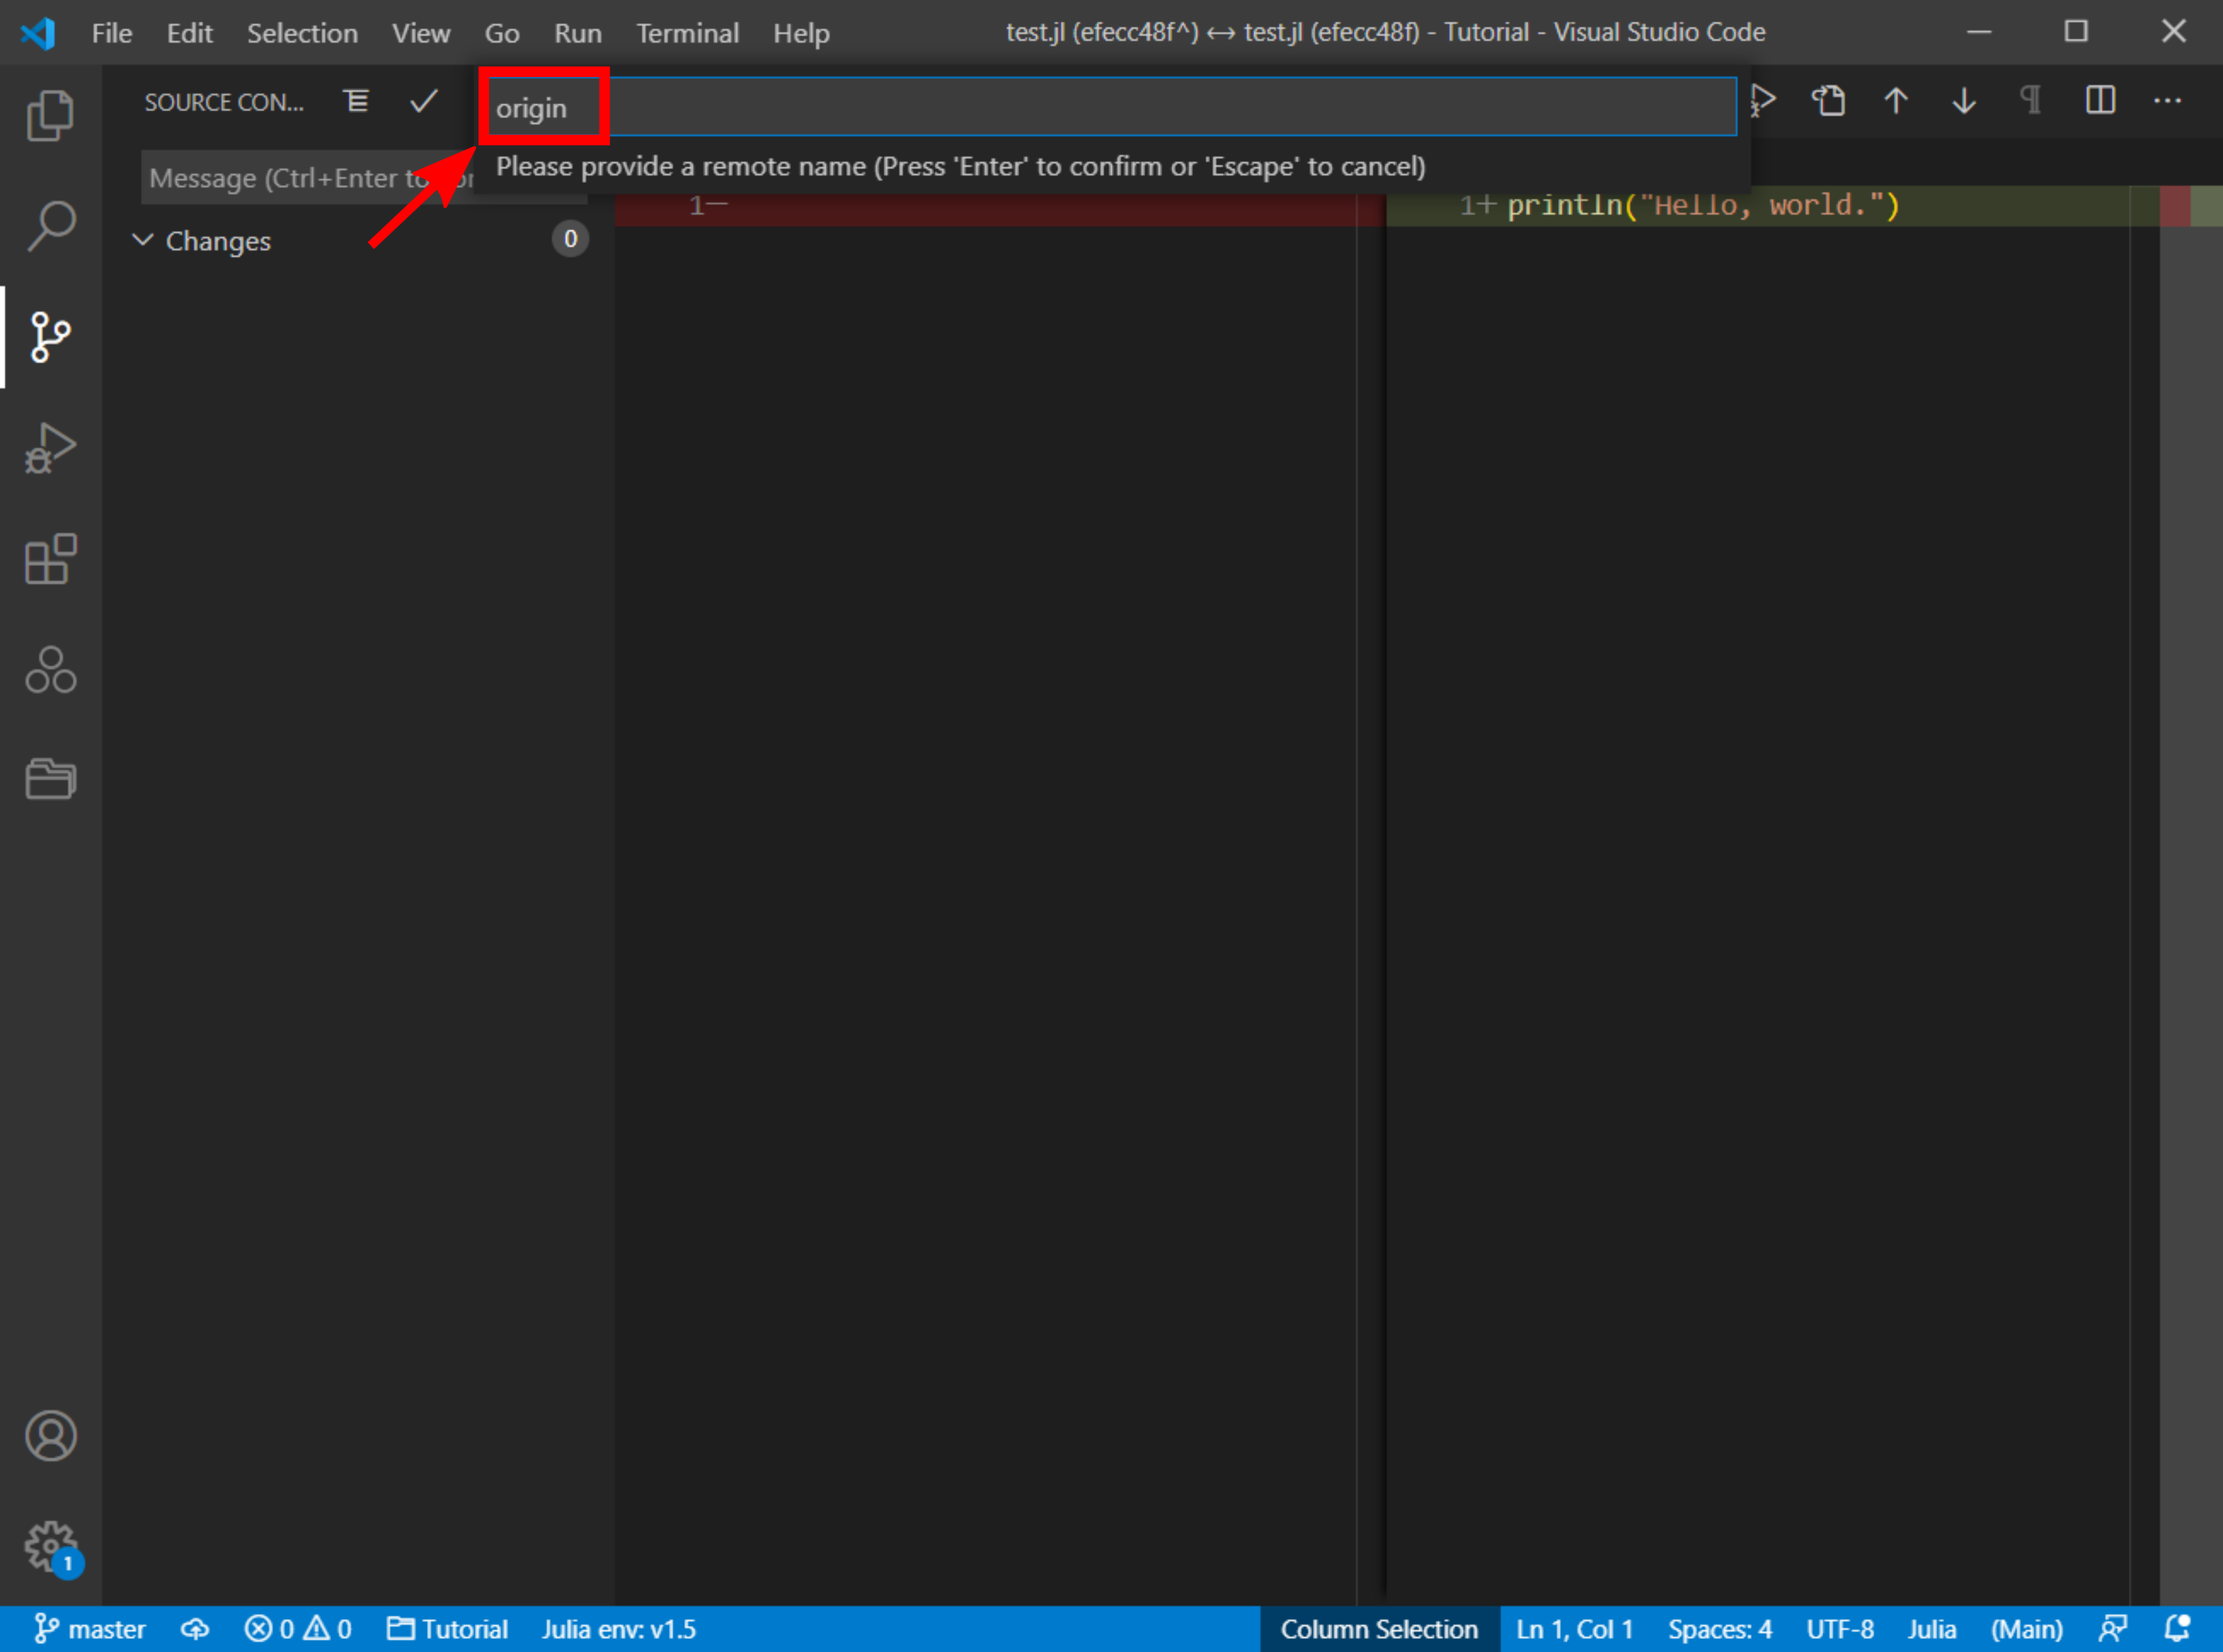
The next step is to choose a remote repository name. This name is used by Git to recognize what remote repository we want to work with, since it is possible to have multiple remote repositories linked with the local repository. If there is only one remote repository, the usual choice of the name is origin.
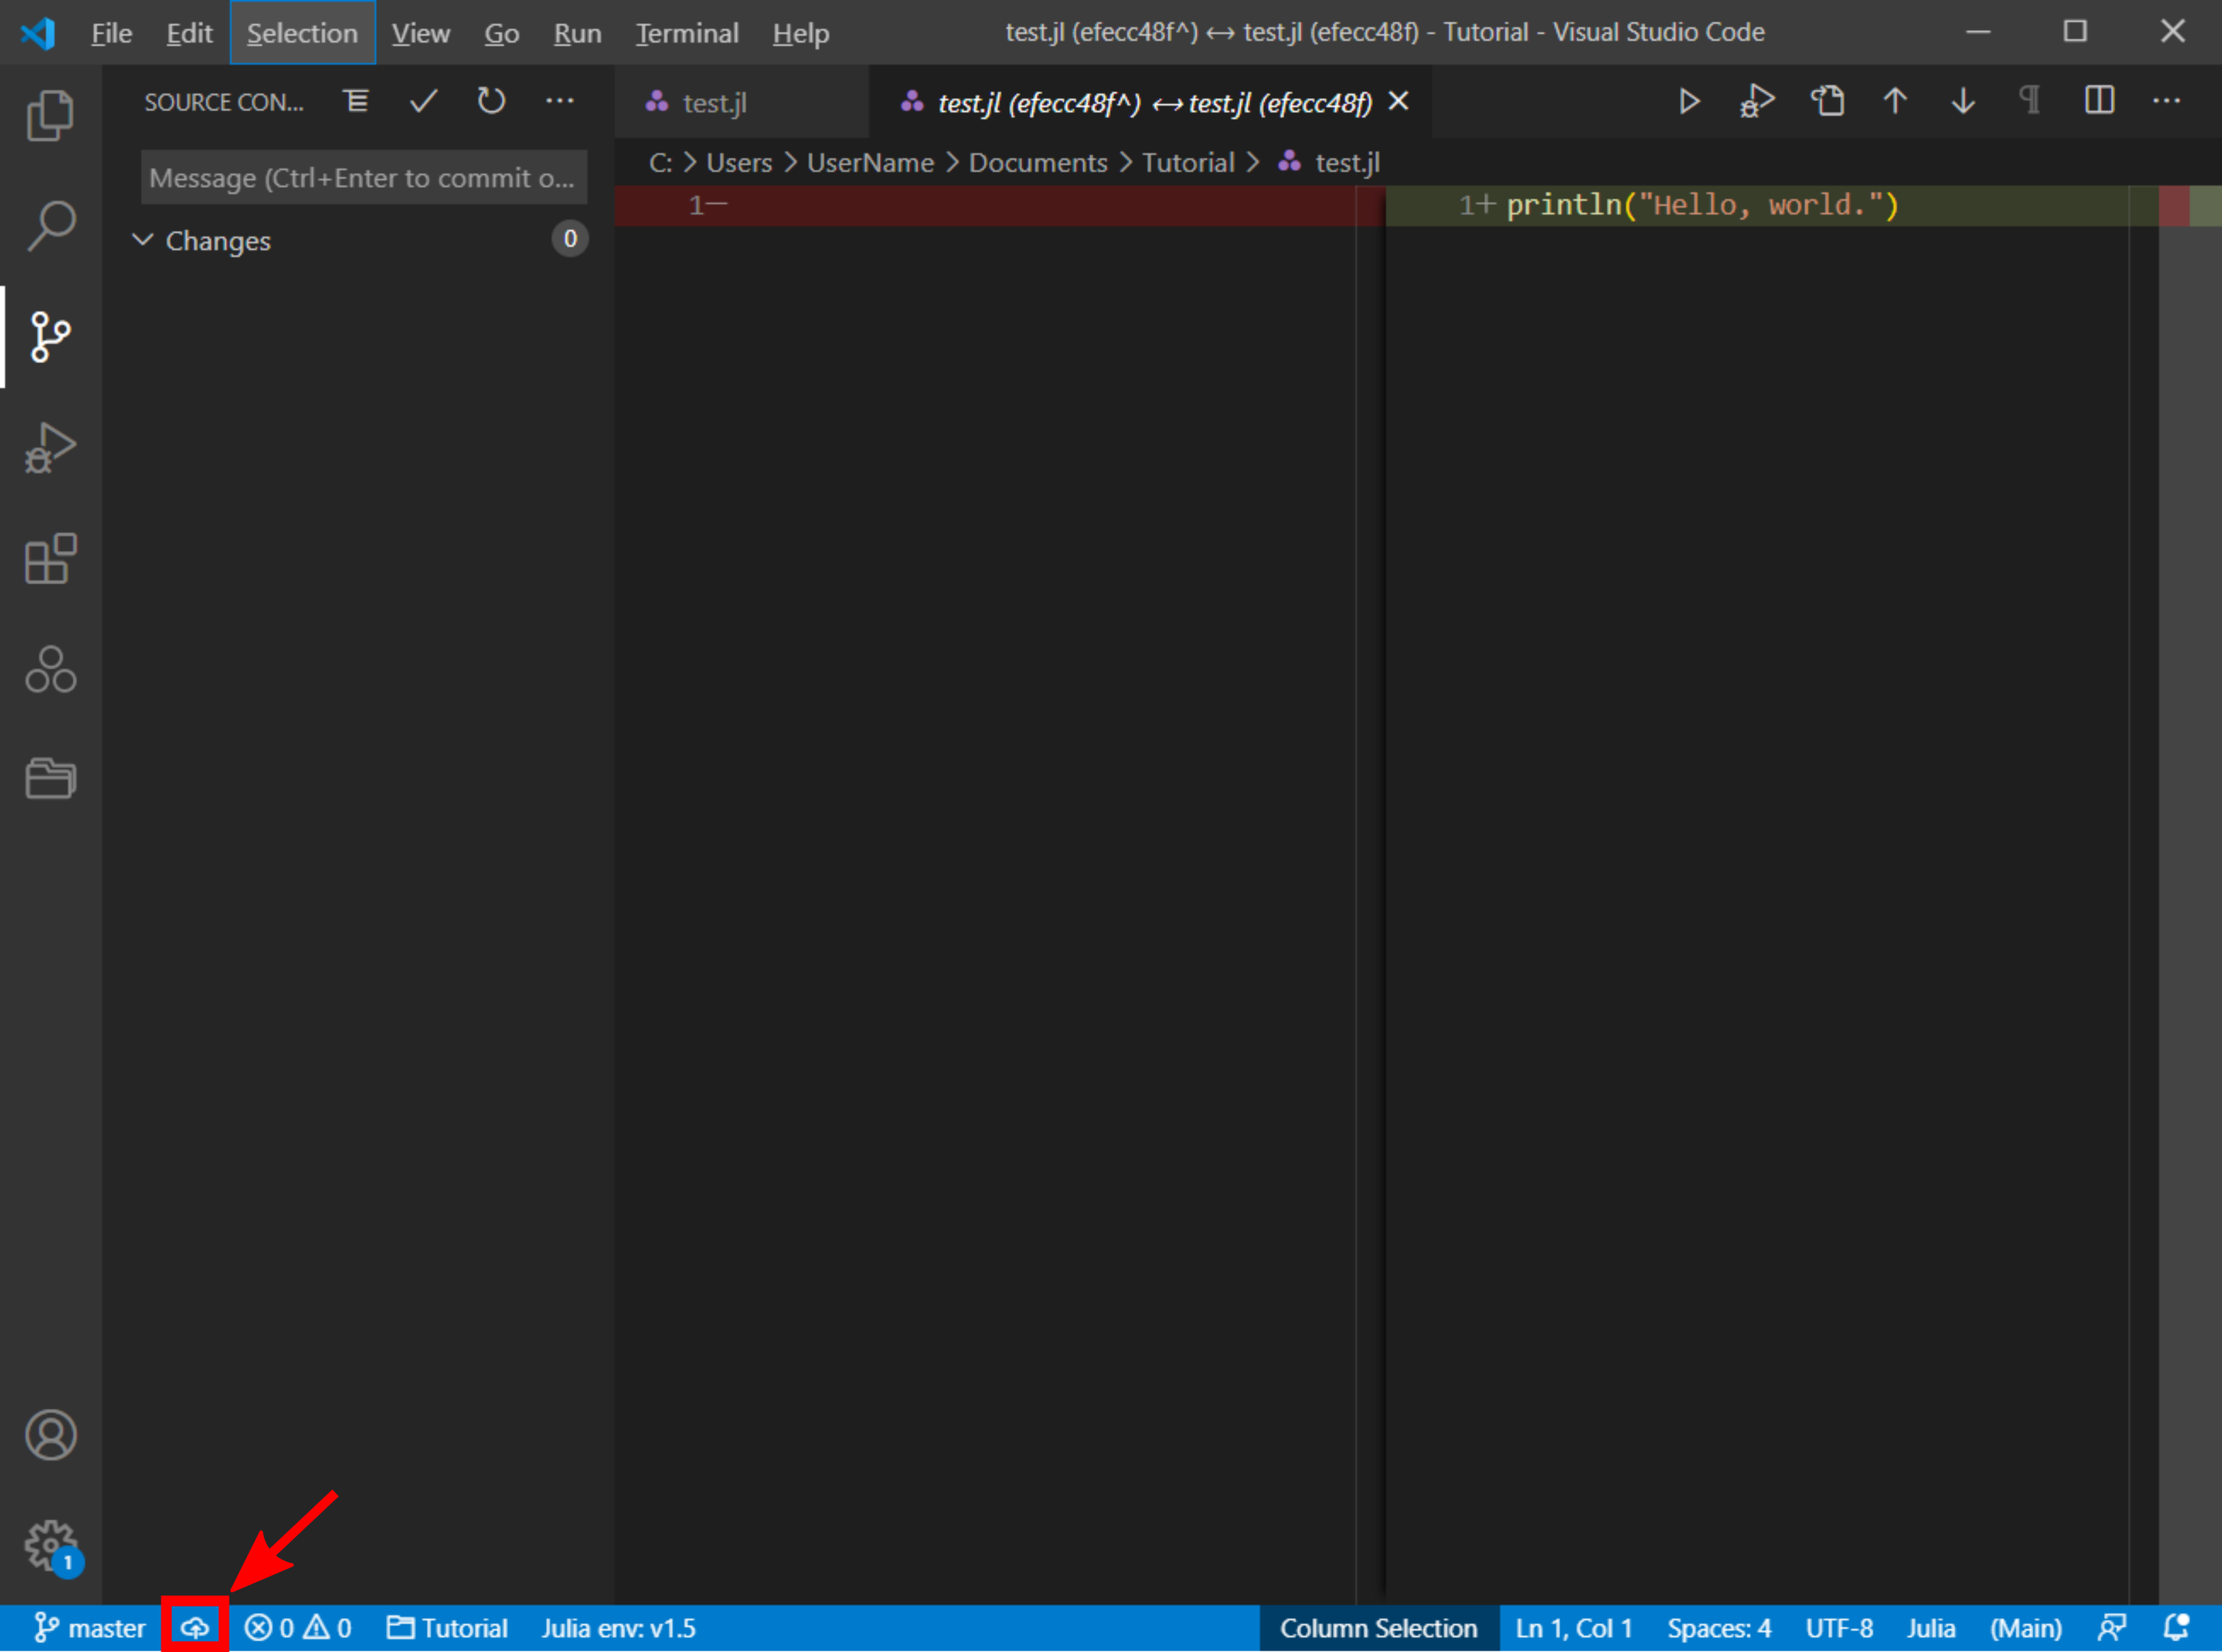
The last step is to push local changes to the remote repository. To do that, press the Publich on GitHub button in the left bottom corner.
And that's all. Now that you've published your first repository on GitHub, you can easily share your project with others.